Your exciting new product now looks blurry and unprofessional. This is a common headache for POD sellers that can directly impact sales and customer satisfaction.
The truth is, crisp, clear graphics aren't just a nice-to-have, they're essential for a successful store. For your designs to look sharp on physical products, you need high-resolution images. This guide will show you how to turn your low-resolution ideas into print-ready 4K masterpieces, ensuring every product you sell looks fantastic.
Why 4K Resolution is the Gold Standard for POD
When you see a blurry t-shirt graphic, it's usually because the source image didn't have enough pixels. For digital screens, 72 dots per inch (DPI) is often fine. But for printing, the industry standard is 300 DPI. Pushing a small, low-DPI image to fit a large product stretches the pixels, causing that telltale pixelation and blur.
Think of it like this: pixels are the tiny building blocks of your image. If you don't have enough blocks to build a large wall, you’re forced to stretch the few you have, leaving ugly gaps. 4K resolution (roughly 3840 x 2160 pixels) gives you a massive amount of these building blocks. This abundance of pixels ensures that your design has enough detail to be printed clearly on everything from mugs to large canvases, all while meeting that crucial 300 DPI standard. Using 4K images means your final product will look just as sharp and vibrant as you imagined.
Top Tools for Upscaling Your Images to 4K
Fortunately, you don't need to be a graphic design expert to fix low-resolution images. Modern AI tools can intelligently rebuild your graphics to stunning resolutions. Here are the best choices to get the job done right.
1. ImgUpscaler: The Go-To Solution for Flawless Upscaling
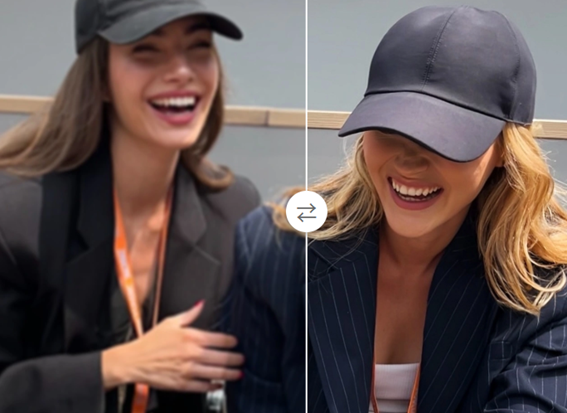
When your primary goal is to increase image resolution quickly and effectively, this is the tool you need. It’s designed to do one thing perfectly: enlarge your images without losing quality. Using advanced AI, the platform analyzes your graphic and intelligently adds new pixels that match the context of the design. This process avoids the blocky, artificial look you get from old-school resizing methods. For POD sellers who need to process multiple designs efficiently, this powerful Image Upscaler is an essential part of the workflow. The user-friendly interface means you can simply upload your image, choose your desired resolution, and download a print-ready file in seconds.
2. AI Photo Editor: More Than Just Upscaling
Sometimes, a design needs more than just a resolution boost. It might need a background removed, a color tweaked, or an unwanted element erased. This is where an all-in-one tool becomes incredibly valuable. It combines the power of an upscaler with a full suite of editing features, saving you from jumping between different software. You can enhance your image to 4K and then immediately refine its colors, sharpen details, or crop it to fit a specific product template. Using an integrated AI Photo Editor streamlines your creative process, giving you the power to perfect every aspect of your design in one convenient place before sending it to print.
A Step-by-Step Guide to Upscaling Your Designs
Using AI to enhance your images is remarkably simple. While every platform is slightly different, the core process follows these simple steps.
Step 1: Start with the Best Possible Source Image
AI is powerful, but it works best when it has a good starting point. An image that is extremely small or heavily compressed will be harder to upscale cleanly. Always try to find or create the highest quality version of your design first. The better the source, the more incredible the final 4K result will be.
Step 2: Upload Your Image to an Upscaler
Most modern upscaling tools feature a simple drag-and-drop interface. Just select your file and upload it to the platform. This is where the AI gets its first look at your image to analyze its content, colors, and textures.
Step 3: Choose Your Upscaling Factor
You'll typically be given options like 2x, 4x, or even 8x. This number represents how many times the tool will multiply the image's dimensions. For example, applying a 4x upscale to an image that is 1000 pixels wide will result in a new image that is 4000 pixels wide. Choose the factor that gets you closest to or above the 4K mark (around 3840 pixels on the longest side).
Step 4: Let the AI Work Its Magic
Once you've selected your settings, the AI gets to work. This isn't simple stretching. The algorithms are actively creating new pixels based on what they've learned from millions of other images. It rebuilds edges, refines textures, and fills in details in a way that looks natural and clean. This process usually only takes a few seconds.
Step 5: Review and Download Your 4K Image
Before you download, use the preview window to inspect the result. Zoom in on fine lines and detailed areas to see the improvement. Once you're happy, download the file. For POD, a PNG format is often best, especially if your design has a transparent background. Otherwise, a high-quality JPG will work well.
Common Mistakes to Avoid When Upscaling for Print
Creating a beautiful 4K image is just the first step. To ensure your final product is perfect, steer clear of these common pitfalls.
Mistake 1: Over-Upscaling a Very Low-Quality Image
While AI is impressive, it has limits. Trying to turn a tiny, 100x100 pixel thumbnail into a giant wall canvas will likely result in a soft or "painterly" effect. The AI has to invent too much information. It's always best to start with a decent source file and have realistic expectations about the outcome.
Mistake 2: Ignoring Color Profiles
Computer screens and printers handle color differently. Screens use the RGB (Red, Green, Blue) color model, while most printers use CMYK (Cyan, Magenta, Yellow, Black). An image that looks bright and vibrant on your screen can appear duller when printed if the color profile isn't managed correctly. Always check your POD provider's file requirements; some may ask for files in sRGB, while others might prefer CMYK.
Mistake 3: Forgetting to Check the Final DPI
After upscaling, you have an image with a high pixel count, but you still need to ensure it meets the 300 DPI requirement at the final print size. You can check this in most photo editing software. For example, your 4000x4000 pixel image can be printed at a high-quality 13.3 x 13.3 inches (4000 pixels / 300 DPI). Confirming this step prevents your POD service from rejecting the file.
Beyond T-Shirts: Other POD Products That Demand 4K
High-resolution images are crucial for more than just apparel. To maintain a professional and high-quality brand, your designs need to be sharp across your entire product catalog.
* Posters and Canvas Prints: On a large print, every detail is magnified. Any pixelation or softness becomes immediately obvious and can ruin the look of the artwork.
* Blankets and Tapestries: Fabric prints, especially on large items like blankets, require a lot of image data to avoid looking faded or blurry.
* Phone Cases: While small, phone cases are held close, and customers will notice if the design isn't perfectly sharp.
* Mugs and Tumblers: A wrapped design needs to hold its integrity from every angle. High resolution ensures that text and fine lines are readable and crisp.
* Tote Bags: Designs on tote bags often have bold lines and text. 4K resolution ensures those edges are clean and professional, not jagged.
Frequently Asked Questions (FAQ)
What's the difference between resizing and upscaling?
Resizing simply stretches the existing pixels, which makes the image larger but also blurry. AI upscaling intelligently creates new pixels, adding real detail to enhance the image and increase its resolution without the blur.
Is AI image upscaling free?
Many AI upscaling tools offer free trials or a certain number of free credits so you can test their quality. For sellers who need to process many images, paid plans typically offer higher resolution outputs, faster processing, and batch capabilities.
Can I upscale any image to 4K?
You can upscale nearly any image, but the quality of the result depends heavily on the source file. A clear, medium-sized image will yield a much better 4K result than a tiny, heavily compressed thumbnail.
Will the upscaled image look exactly like a native 4K photo?
An AI-upscaled image can look incredibly close to a native high-resolution image, especially for graphic designs. For photographs, the AI does a fantastic job of enhancing detail, but it is reconstructing information, so the texture may be slightly different from a photo taken with a high-end camera.
Conclusion
Blurry prints and resolution warnings don't have to hold your print-on-demand business back. By using modern AI tools to upscale your images to 4K, you can ensure that every product you sell features a sharp, professional, and eye-catching design. This commitment to quality not only leads to happier customers and better reviews but also builds a stronger, more trusted brand. Stop letting low resolution limit your creativity and start transforming your designs into stunning, print-ready art today.


Follow us on social media